Machine Learning MNIST handwritten character recognization
In this project, we will learn how to implement MNIST handwritten datasets using machine learning. Before start it first we know what is MNIST
What is MNIST?
The MNIST database contains 60,000 training images and 10,000 testing images. Half of the training set and half of the test set were taken from NIST's training dataset, while the other half of the training set and the other half of the test set were taken from NIST's testing dataset. There have been a number of scientific papers on attempts to achieve the lowest error rate; one paper, using a hierarchical system of convolutional neural networks, manages to get an error rate on the MNIST database of 0.23%. The original creators of the database keep a list of some of the methods tested on it. In their original paper, they use a support vector machine to get an error rate of 0.8%. An extended dataset similar to MNIST called EMNIST has been published in 2017, which contains 240,000 training images, and 40,000 testing images of handwritten digits and characters.

Load dataset
First, import the TensorFlow library and then load datasets.
import tensorflow as tf

#Load the mnist dataset into a variable
mnist = tf.keras.datasets.mnist # 28*28 images of hand written digits 0-9

(x_train, y_train),(x_test, y_test) = mnist.load_data()  #Split the data into train and test sets
Now we are ready to show the MNIST datasets image, here simple code to show the MNIST Datasets.
import matplotlib.pyplot as plt  # import matplotlib library

#print(x_train[0])
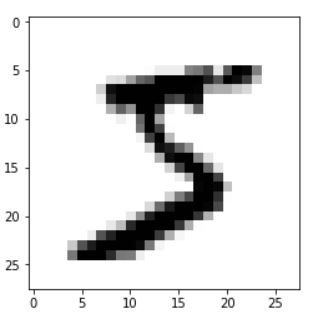
plt.imshow(x_train[0])   # used to show the pixels as an image, so the zeroth index has a 5 in the image
plt.show()
Now showing the image of zero index
#showing the image
plt.imshow(x_train[0],cmap = plt.cm.binary)
Output:

Normalize the Datasets
Now we have normalized the data, after this, it is ready to fit into the model
#Normalize the data or scaling the data
from keras.models import Sequential
from keras.layers import Dense, Dropout, Conv2D, Flatten

x_train = tf.keras.utils.normalize(x_train, axis =1)
x_test = tf.keras.utils.normalize(x_test, axis = 1)
Fit into the Sequential Model
After normalizing, train and test data is ready to fit into the model.
# Building up the Model
model = Sequential()
model.add(Flatten())
model.add(Dense(128, activation = 'relu'))
model.add(Dense(128, activation = 'relu'))
model.add(Dense(10, activation = 'softmax'))

#Configuring the model before training it
model.compile(optimizer = 'adam', loss = 'sparse_categorical_crossentropy', metrics = ['accuracy'])
#Fit the model
model.fit(x_train, y_train, epochs = 3)
Finding the accuracy of Model
val_loss, val_accuracy = model.evaluate(x_test, y_test)  #evaluating the model with the test set
print(val_loss,'Loss on the test set')
print(val_accuracy,'Accuracy on the test set')
Output:
10000/10000 [==============================] - 0s 38us/step 0.09503882342190481 Loss on the test set 0.9718 Accuracy on the test set
Save the model
# Save the model
model.save('mnist_save.model')
Loading the saved model
#Loading the model
new_model = tf.keras.models.load_model('mnist_save.model')
Predict the result
# it requires a list to be passed as an argument
predictions = new_model.predict([x_test])
Finding the Correct Result
#finding the actual value
import numpy as np
print(np.argmax(predictions[0]))  # predicted value
plt.imshow(x_test[0])     # actual value
plt.show()
Output:

Get your project or assignment completed by Deep learning expert and experienced developers and researchers.
OR
If you have project files, You can send it at codersarts@gmail.com directly.